Halibut Nuggets with Hazelnut Crumb Crust

March 31, 2013

Halibut Nuggets with Hazelnut Crumb Crust

Wine Varietal: Off-Dry Riesling

Serves 4

The arrival of fresh halibut, a.k.a. “hippo of the sea,” is one of the harbingers of spring in the Northwest. Luscious hazelnuts, a product of orchards in Washington state and Oregon, elevate chunks of the dense, lean, large-flaked finfish to new heights in this easy, yet elegant riff on traditional fish ‘n’ chips.

2 tablespoons Dijon mustard

2 tablespoons soy sauce

2 tablespoons butter, melted

1 tablespoon honey

1/4 cup Panko bread crumbs or unseasoned dry bread crumbs (See Cook’s Hints, below)

1/4 cup finely chopped hazelnuts

2 teaspoons minced cilantro, plus extra sprigs for garnish

1 1/2 pounds halibut fillets, skin and bones removed, rinsed, drained, patted dry, and cut into 16 pieces

Salt and freshly ground black pepper

3 cups cooked jasmine or basmati rice

1. Preheat the oven to 450°F. Lightly coat a baking sheet with oil or nonstick cooking spray. Set the baking sheet aside.

2. In a small mixing b owl, stir together the mustard, soy sauce, butter, and honey. In another small bowl, mix together the bread crumbs, hazelnuts, and the minced cilantro.

3. Lightly sprinkle the halibut pieces with salt and pepper. Dip the top of each halibut nugget in the honey-mustard mixture, allow the excess to drain off, then dip in the hazelnut-crumb mixture. Place the nuggets on the prepared baking sheet without crowding.

4. Bake the halibut nuggets for 8 to 12 minutes, or 10 minutes per inch of thickness. The fish should just turn opaque. To test for doneness, cut into the center of one nugget with the tip of a small, sharp knife and pull apart slightly.

5. To serve, mound the rice in the center of individual plates. Place the nuggets in a symmetrical pattern around the rice mounds and garnish with the cilantro sprigs.

Cook’s Hints: To make unseasoned dry bread crumbs, place a layer of white or whole-wheat bread slices on a baking sheet and bake at 300°F for 10 to 15 minutes, or until the bread turns light brown and dries completely. Allow the bread to cool, then place it in a food processor or blender and process until you have the desired texture. Panko bread crumbs are a lightly colored, coarsely textured crumb used in Japanese cooking to coat fried foods. They are available in Asian markets and in the Asian section of most grocery stores.

Recipe reprinted with permission from the “Pike Place Public Market Seafood Cookbook,” gift edition and e-edition, by Braiden Rex-Johnson, copyright 2005 and 2012. Published by Ten Speed Press, a division of Random House, Inc.

Wild-Rice-Stuffed Trout

February 28, 2013

Wild-Rice-Stuffed Trout

Wine Varietal: Oregon Pinot Noir

Serves 4

A hearty stuffing studded with walnuts, dried cherries, and green onions goes great with the mild flavor of farm-raised trout, and would be a particularly desirable meal served with steamed or sautéed ruby chard. Pair the stuffed fish and chard with an Oregon Pinot Noir.

2 tablespoons olive oil

1 tablespoon unsalted butter

1 small white or yellow onion, diced

2 cloves garlic, minced

1/2 red bell pepper, diced

1/2 cup wild rice, rinsed and well drained

3/4 cup water

3/4 cup chicken stock

1/4 teaspoon dried thyme, crumbled

1/4 teaspoon kosher salt

1/8 teaspoon freshly ground black pepper

Pinch of ground allspice

1/4 cup toasted walnuts, finely chopped (See Cook’s Hint, below)

1/4 cup dried cherries or dried cranberries, diced

2 green onions, finely chopped

4 whole, dressed trout, 3/4 pound each, rinsed, drained, and patted dry

Additional salt and freshly ground black pepper

1. Melt 1 tablespoon of the olive oil and the butter in a medium saucepan over medium-high heat; add the onion, garlic, and red bell pepper. Cook until the vegetables are tender, stirring occasionally, 10 minutes. Do not allow the vegetables to brown. Add the wild rice and cook 2 minutes, stirring often to coat the individual rice grains with the oil.

2. Add the water, chicken stock, thyme, 1/4 teaspoon salt, 1/8 teaspoon pepper, and the allspice and bring to a boil. Reduce the heat to medium-low and simmer 45 minutes, or until the rice kernels blossom and the rice is tender. Remove the rice from the heat, drain off any excess water, and stir in the walnuts, dried cherries, and green onions.

3. Ten minutes before cooking the fish, preheat the oven to 350°F. Lightly coat a baking sheet large enough to hold the trout without crowding with oil or spray with nonstick cooking spray.

4. Lightly sprinkle  salt and pepper inside the cavities of the fish. Spoon one-quarter of the stuffing into the cavity of each fish and place on the prepared baking sheet. Brush the outside of the trout with the remaining olive oil and cook 18 to 20 minutes, or until the trout are opaque through the thickest part (just behind the head).

5. Divide the trout among individual plates and serve immediately.

Cook’s Hint: To toast the walnuts, place them in a dry nonstick skillet over medium heat, shaking the pan often until they begin to turn light brown and become aromatic, about 3 to 5 minutes. Cool and chop as directed.

Recipe reprinted from the “Pike Place Public Market Seafood Cookbook,” gift edition and e-edition, by Braiden Rex-Johnson, copyright 2005 and 2012. Published by Ten Speed Press, a division of Random House, Inc.
 

Smoky Clam Chowder

January 31, 2013

Smoky Clam Chowder

Wine Varietal: Pinot Blanc or Pinot Gris

Serves 4

The addition of salmon jerky gives this rendition of clam chowder a hearty flavor and a real Northwest flair. Salmon jerky is available at the four fish stands in the Pike Place Market, although I am especially fond of the version made by Pure Food Fish.

2 tablespoons butter

1 1/2 cups 1/2-inch cubes boiling potatoes

1/2 cup chopped celery

1/2 cup chopped white or yellow onion

1 (8-ounce) bottle clam juice

2 cups milk

Pinch dried thyme, crumbled

Pinch crushed red pepper flakes

2 (6.5-ounce) cans chopped clams, with juice

1 cup heavy whipping cream

2 to 3 tablespoons diced salmon jerky

Salt and freshly ground black pepper

1. Melt the butter in a large saucepan over medium heat and add the potatoes, celery, and onion. Cook until vegetables are tender-crisp, stirring occasionally, 5 minutes.

2. Add the clam juice, milk, thyme, and red pepper flakes. Stir well and bring to a simmer. Simmer gently until potatoes are tender, stirring occasionally, 10 minutes.

3. Add the clams, whipping cream, and smoked salmon, and stir well. Cook several minutes more, or until the mixture is warmed through. Season to taste with salt and black pepper.

4. To serve, ladle the clam chowder into soup bowls and serve right away.

Cook’s Hint: For informal croutons, lightly butter Saltine crackers, place them in the bottom of the soup bowls, and pour over the chowder.

Recipe reprinted from “Pike Place Public Market Seafood Cookbook,” by Braiden Rex-Johnson.


Pacific Rim Seafood Boil

January 1, 2013

Happy New Year! As we say goodbye to the holidays and heavier-than-normal eating and drinking patterns, here’s a recipe that will begin your diet regimen in style. It’s an all-time favorite of mine that I hope will become one of yours as well. It was printed years ago in one of my early books, “Inside the Pike Place Market.” Enjoy!

Pacific Rim Seafood Boil

Wine Varietal: Off-Dry Riesling

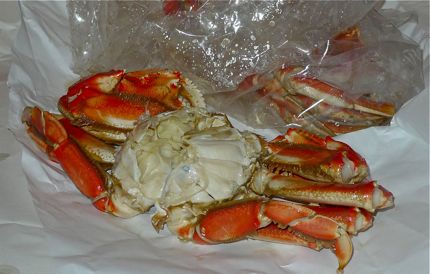
The Dungeness crab is the prize catch of the oldest shellfish fishery in the North Pacific. Cancer Magister, the “big crab,” provides one of the best traditional foods of the region, often simply steamed or boiled. Here the “Dungie” finds refuge in a light, healthy broth redolent with fresh lemongrass and gingerroot, a Pacific Rim twist on the traditional Northwest crab feed. To eat this dish properly, seafood forks, crab crackers, and extra napkins are mandatory.

1 tablespoon peanut oil

1 pound Alaskan spot prawns or medium-sized shrimp, shelled and deveined, shells reserved

4 stalks lemongrass, outer leaves discarded and soft inner core chopped into 1/4-inch rounds, about 1/2 cup

2 tablespoons minced gingerroot

4 cloves garlic, peeled and halved

Pinch hot red pepper flakes

1/2 cup mirin (Japanese rice wine) or dry Sherry

4 cups homemade vegetable stock OR 2 (14 1/2 oz.) cans vegetable broth

1 1/2 cups water

2 precooked 1- to 1 1/2-pound Dungeness crabs in the shell, cracked into pieces suitable for picking

Pickled ginger, for garnish

1. Heat oil in a large wok or Dutch oven over medium heat. Add the shrimp shells, lemongrass, gingerroot, and garlic and cook 2 to 3 minutes, or until the herbs give off their odor and shrimp shells turn opaque, stirring frequently. Add mirin, vegetable stock, and water and bring to a boil. Turn down heat, cover pan, and simmer 10 minutes. Remove broth from heat and pour broth through a fine-meshed strainer, pressing solids with a spoon to squeeze out all the juice. Discard solids.

2. Return broth to wok and bring to a gentle simmer. Add the spot shrimp and cook 2 to 3 minutes, or until shrimp just turn pink. With a slotted spoon, remove shrimp to a bowl and reserve.

3. Add the crab pieces to the broth and cook 2 to 3 minutes, or until crab is warmed through, stirring occasionally to redistribute. Add shrimp to the pan and remove from heat.

4. To serve, divide seafood and broth among individual bowls and garnish with pickled ginger.

Serves 4 as an entrée; 6 as an appetizer


Recipe of the Month: Smoked Salmon Dutch Baby

December 31, 2012

Smoked Salmon Dutch Baby with Dill Sauce

Wine Varietal: Sparkling Wine or Champagne

Serves 4 as an appetizer

Dutch babies, also referred to as German babies, baked pancakes, or oven pancakes, are puffy pancakes cooked in a skillet in the oven. Although often served with a sauce of lemon juice mixed with confectioner’s sugar, I like this savory version spiked with smoked salmon and sautéed veggies and served as an appetizer. Served with a glass (or two) of your favorite bubbly, it would be a lovely way to ring in the New Year!

1 tablespoon olive oil

1/2 small white or yellow onion, chopped

1/2 red bell pepper, chopped

1 tablespoon butter

3/4 cup lowfat milk

1/3 cup flour

Dash freshly ground white pepper

4 eggs or 1 cup egg substitute, such as Egg Beaters

1 1/2 teaspoons ground sweet paprika

1 package (3 ounces) cold-smoked salmon, such as Nova or lox, cut into 1/4-inch slices

1. Heat the oven to 400°F.

2. Heat the olive oil in a medium skillet over medium-high heat. Add the onion and red bell pepper and cook until the vegetables are tender, stirring often, 5 to 7 minutes. Remove from the heat and reserve.

3. Melt the butter in a large, nonstick, ovenproof skillet in the oven until sizzling. Wrap the handle of the skillet with foil if it is not oven-safe, and check the skillet frequently so that the butter doesn’t burn.

4. Blend the milk, flour, and white pepper in a food processor or blender. Add the eggs and process just until blended.

5. Remove the skillet from the oven and transfer the reserved vegetables to skillet, distributing evenly. Immediately pour in the egg batter.

6. Bake in the center of the oven until the Dutch baby is puffed and lightly browned, 12 to 15 minutes. Remove from the oven, sprinkle evenly with paprika, and place the salmon pieces over top of pancake. Cut into 8 wedges and serve immediately or allow to come to room temperature.

7. To serve, place 2 wedges on each appetizer plate and place a dollop of Dill Sauce beside the wedges.

Dill Sauce

Makes 1/2 cup

1/4 cup plain nonfat yogurt

1/4 cup nonfat or lowfat sour cream

1 tablespoon fresh snipped dill or 1 teaspoon dried dill, crumbled

Tabasco

Salt

Place yogurt, sour cream, and dill in a small mixing bowl and stir to blend. Season to taste with Tabasco and salt. Cover and refrigerate until ready to use.

Cook’s Hint: To insure the Dutch baby comes out of the pan easily, this recipe works best when prepared in a nonstick skillet. And no peeking while the Dutch baby is cooking; opening the oven door while baking will cause the pancake to fall!


Fabulous Holiday Recipe: Mixed Greens with Fallen Cheese Soufflés and Champagne Vinaigrette

December 27, 2012

As we count down to the holidays and begin thinking about what to serve our families and friends for the special day (whatever you choose to celebrate), we will post some of our favorite recipes of all time for your consideration. Enjoy, and let us know how you like them!

Mixed Greens with Fallen Cheese Soufflés and Champagne Vinaigrette

Varietal: Riesling, Syrah, Cabernet Franc

Serves 6

In this savory salad that first appeared within the pages of my seventh book, “Pacific Northwest Wining & Dining,” the cheese soufflés and roasted red peppers act as bridge ingredients, so wine pairings are versatile. You can go with everything from Riesling to Syrah to Cabernet Franc!

Champagne Vinaigrette

3/4 cup extra virgin olive oil

1/4 cup Champagne vinegar

Kosher salt

Freshly ground black pepper

1/2 pound fresh asparagus, woody stems trimmed

1 cup (4 ounces) shredded Samish Bay Montasio cheese or high-quality Parmesan or Parmigiano-Reggiano cheese

1 cup heavy whipping cream

2 large eggs, slightly beaten

Kosher salt

Freshly ground white pepper

4 to 6 ounces fresh arugula leaves

4 to 6 ounces fresh watercress

1/2 cup roasted red bell peppers, homemade (see Cook’s Hint, below) or store-bought (pat very dry), cut into bite-sized pieces

1. To prepare the Champagne Vinaigrette, in a cruet or container with a tight-fitting lid, combine the olive oil and vinegar. Shake well to combine. Season to taste with salt and pepper and set aside.

2. Preheat the oven to 325°F. Spray six 4-ounce ramekins or custard cups with nonstick vegetable cooking spray.

3. Prepare an ice bath (see Cook’s Hint, below). Bring a large pot of water to a boil, add the asparagus, and cook, stirring occasionally, until the asparagus turns bright green and become tender-crisp, 2 to 5 minutes (depending on thickness). Plunge the asparagus into the ice bath until cool enough to handle. Remove the asparagus, pat dry, cut into bite-sized pieces, and set aside.

4. In a small saucepan, combine the cheese and cream. Cook over medium-high heat, stirring constantly, until the cheese melts. Heat until small bubbles form around the edges of the cream and steam rises off the top, but do not allow the cream to come to a boil.

5. Remove from the heat and, in a mixing bowl, whisk a very small amount of the cream mixture into the eggs (this is called tempering). Continue adding the cream very slowly and whisking constantly, being careful not to scramble the eggs. Season to taste with salt and white pepper.

6. Divide the cheese mixture evenly among the custard cups (for easier handling, place the custard cups on a baking sheet without crowding). Bake 20 to 25 minutes, or until they turn golden around the edges and puff. Remove from the oven and allow to cool on a wire rack for 30 minutes at room temperature, then cover and cool 2 to 3 hours (or up to 2 days) in the refrigerator. Do not worry if the soufflés fall; they are supposed to!

7. When ready to serve, combine the arugula, watercress, reserved asparagus, and peppers in a large bowl and toss with 1/4 to 1/3 cup of the vinaigrette, or more to taste. Divide the salad among 6 salad plates. Run a small knife around the inside of each custard cup to loosen. Carefully invert the cup over the salad and tap gently to release the custard. Position the custard on top of the greens and serve.

Cook’s Hints: (1) Roast peppers in one of these three ways. Roast over a gas burner on high heat, turning frequently with kitchen tongs, until well charred on all sides; broil under a hot broiler several inches from the heat, turning frequently, until brownish-black blisters form; or roast in a preheated 400°F oven for 10 to 15 minutes, turning frequently, until brownish-black blisters form. Put the roasted peppers in a paper or plastic bag, close the top, and let stand for 10 minutes. Remove the peppers from the bag and scrape off the skin; cut away the seeds and ribs. Wipe away any remaining black particles with a damp cloth, then slice or chop as needed. If desired, use thin plastic or rubber gloves to protect your hands while preparing chile peppers. (2) Ice baths are called for when blanching vegetables or fruits; the cold water immediately stops the cooking process so that the produce doesn’t become overcooked. To make an ice bath, simply fill a large mixing bowl with ice cubes and add cold water to cover the cubes.

Recipe reprinted from Pacific Northwest Wining & Dining: The People, Places, Food, and Drink of Washington, Oregon, Idaho, and British Columbia (Wiley, 2007, $34.95) by Braiden Rex-Johnson.

Fabulous Holiday Recipe: Herbed Goat Cheese with Walnut Crostini

December 21, 2012

As we count down to the holidays and begin thinking about what to serve our families and friends for the special day (whatever you choose to celebrate), we will post some of our favorite recipes of all time for your consideration. Enjoy, and let us know how you like them!

Cervelle de Canut (Herbed Goat Cheese with Walnut Crostini)

Varietal: Chardonnay (Unoaked) or Syrah

Serves 6 to 8 as an appetizer

This easy-to-make appetizer, originally published in “Pacific Northwest Wining and Dining,” is the perfect nosh to keep on hand for holiday drinks and unexpected guests. Also nice is its versatility with wine, since it works with both white (an unoaked Chardonnay, Pinot Gris or Blanc, or even bubbly!) or red (Syrah or Merlot).

8 ounces Juniper Grove Fromage Blanc or soft, fresh goat’s-milk cheese (chèvre)

1/2 cup crème fraîche

1/4 cup minced shallots

Juice and freshly grated zest of 1 lemon

2 tablespoons extra virgin olive oil

1 tablespoon minced fresh flat-leaf parsley

1 tablespoon minced fresh chives

Fine sea salt

Freshly ground black pepper

12 to 16 slices artisan walnut bread, toasted

1/2 head frisée, torn into bite-sized pieces

1. With a whisk or in a food processor, whip the fromage blanc and crème fraîche with the shallots, lemon juice and zest, olive oil, parsley, and chives. Season to taste with salt and pepper.

2. To serve, spread the herbed goat cheese on the toasted walnut bread and arrange on a serving plate. Top with frisée leaves.

Recipe reprinted from Pacific Northwest Wining & Dining: The People, Places, Food, and Drink of Washington, Oregon, Idaho, and British Columbia (Wiley, 2007, $34.95) by Braiden Rex-Johnson.

Fabulous Holiday Recipe: Citrus Yogurt Cake with Baked D’Anjou Pears and Meyer Lemon Marmalade

December 18, 2012

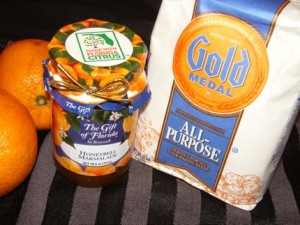
Orange, or any other citrus-flavored marmalade, is a key ingredient in Citrus Yogurt Cake.

As we count down to the holidays and begin thinking about what to serve our families and friends for the special day (whatever you choose to celebrate), we will post some of our favorite recipes of all time for your consideration. This light and lovely cake is a welcome alternative to the typical heavy holiday flavors (chocolate, mint, eggnog). 

Citrus Yogurt Cake with Baked D’Anjou Pears and Meyer Lemon Marmalade

Varietal: Gewürztraminer or Riesling

Serves 8

This light, innovative, citrus-flavored cake from “Pacific Northwest Wining & Dining” can be flavored with either orange or lemon zest and is accompanied by cilantro-spiced pears and the marmalade sauce of your choice (Meyer lemon, orange, or grapefruit). It makes a lovely pairing with a medium-bodied, slightly sweet wine such as an aromatic Gewürztraminer or and off-dry Riesling.

Baked D’Anjou Pears

1/2 cup granulated sugar

1 tablespoon ground coriander

4 ripe, firm D’Anjou pears, peeled, cored, and cut in half

Citrus Yogurt Cake

1 1/2 cups granulated sugar, plus 1 tablespoon for coating the pan

1 1/2 cups plain, whole-milk yogurt (See Cook’s Hint, below) 

4 large eggs

2 1/2 teaspoons freshly grated orange or lemon zest

1 teaspoon pure vanilla extract

2 1/4 cups all-purpose flour

1 tablespoon baking powder

Pinch of table salt

3/4 cup vegetable oil

1/2 to 3/4 cup Meyer lemon, grapefruit, or orange marmalade

Sweetened whipped cream, vanilla ice cream, or frozen yogurt, for serving (optional)

1. Preheat the oven to 350°F. Line a baking sheet with aluminum foil first (for easy clean-up) and grease or coat with nonstick cooking spray.

2. To make the Baked D’Anjou Pears, in a small bowl, mix together the sugar and the coriander. Rub the sugar mixture over the pear halves. Arrange the pear halves, cut side down, on the prepared baking sheet. Bake 12 to 15 minutes, or until a small, sharp knife is easily inserted, but the pears are not mushy. Allow the pears to cool completely at room temperature.

3. To make the cake, reduce the oven temperature to 325°F. Grease well or coat with nonstick spray a 5- by-9-inch loaf pan or an 8- to 10-cup fluted tube or Bundt pan. Sprinkle the 1 tablespoon of granulated sugar in the pan and turn to evenly coat the greased surfaces with sugar. Tap out and discard any excess sugar.

4. Add the 1 1/2 cups of sugar, the yogurt, eggs, zest, and vanilla to a large mixing bowl. Stir with a wire whisk until thoroughly combined. In a separate bowl, stir together the flour, baking powder, and salt. Gradually whisk the dry ingredients into the wet ingredients to make a smooth batter. Do not overmix. With a rubber spatula, add the oil, stirring in gently and turning the mixing bowl as you add the oil (a technique known as “folding”).

5. Pour the batter into the prepared pan and bake 1 hour and 15 to 20 minutes if using a loaf pan, or 55 to 65 minutes if using afluted tube or Bundt pan, or until a toothpick or wooden skewer inserted in the center comes out clean. Tent the cake with foil after 1 hour, if needed, to prevent over-browning.

6. Transfer the cake to a wire rack and cool for 10 minutes in the pan. Run a thin knife around the edge of the pan to loosen the cake. Turn out and cool completely, right side up, on the wire rack.

7. When the cake has cooled, cut it into individual slices and place one slice in the center of each small plate. Stir the marmalade well to loosen it or warm at 50 percent power in a microwave oven until softened. Spoon about 1 tablespoon of the marmalade over one side of each piece of cake, allowing a bit to overflow onto the plate. Slice each pear in half lengthwise, starting about 1 inch from the top of the pear and cutting into 1/4-inch slices. Keep the top portion intact and spread out each sliced pear half to form a fan shape. Place a fanned pear half on top of the marmalade, propping it up against the cake. If desired, add a dollop of whipped cream, ice cream, or frozen yogurt.

Cook’s Hint: For the best texture in the cake, choose a brand of yogurt that doesn’t contain pectin or gelatin, such as Dannon or Nancy’s.

Recipe reprinted from Pacific Northwest Wining & Dining: The People, Places, Food, and Drink of Washington, Oregon, Idaho, and British Columbia (Wiley, $34.95) by Braiden Rex-Johnson.

Fabulous Holiday Recipe: Chocolate Pot de Crème

December 14, 2012

As we count down to the holidays and begin thinking about what to serve our families and friends for the special day (whatever you choose to celebrate), we will post some of our favorite recipes of all time for your consideration.

Beginning today: Chocolate Pot de Crème, which hails from Place Pigalle, one of the Pike Place Market’s most romantic and long-running French restaurants. The recipe was included in the “Pike Place Market Cookbook, Second Edition.”

Chocolate Pot de Crème

Varietal: Dessert Wine (Port)

Serves 6

Pot de crème translates from the French as “pot of cream,” but I simply refer to this intensely chocolate-y dessert as a “pot of pleasure.” Just be sure to choose a bittersweet chocolate you like to eat out of hand, since some bittersweet chocolates can be intensely dark and bitter, and this three-ingredient recipe contains no added sugar. “Chocolate Pot” serves as the perfect foil to a dense, rich Port wine (ruby or tawny—your choice!), such as those made by Hinzerling or Powers in Washington State, or Sineann in Oregon.

1/2 pound good-quality bittersweet chocolate, coarsely chopped
3 cups whipping cream
6 large egg yolks
Fresh mint leaves, optional

1. Melt the chocolate in a double boiler or a stainless-steel or glass bowl placed over a saucepan filled with simmering (not boiling!) water, stirring occasionally. Be careful not to get any water into the chocolate or it could seize (clump and harden) and become unusable. Slowly add 2 cups of the whipping cream, whisking until the chocolate and cream are well mixed, and bring just to a boil, whisking occasionally and being careful not to scorch the cream.

2. Remove the chocolate/cream mixture from the heat. In a medium mixing bowl, whisk the egg yolks until light and fluffy. Whisking constantly, slowly pour the chocolate mixture into the yolks until thoroughly combined.

3. Divide the chocolate mixture evenly among six ramekins or custard cups (6-ounce capacity), then refrigerate 1 1/2 to 2 hours, or until the chocolate sets and chills. After the chocolate chills completely, cover the ramekins with plastic wrap. The desserts can be refrigerated for up to one week or, alternatively, the ramekins can be well wrapped and frozen, then thawed overnight in the refrigerator before serving. (May be made from one week up to six months ahead.)

4. Just before serving, whip the remaining 1 cup cream until stiff peaks form. Remove the ramekins from the refrigerator, add a dollop of whipped cream to each, and garnish with fresh mint leaves, if desired.

Chocolate Espresso Cheesecake

November 30, 2012

Chocolate Espresso Cheesecake

Wine Varietal or Liqueur Pairing: Raspberry Dessert Wine, Kahlua, or Amaretto

Serves 8 to 12

Thanks to Nancy Nipples, proprietor of The Pike Place Market Creamery, for this recipe, which was printed in the second edition of the “Pike Place Market Cookbook.” Dense cheesecake fortified with espresso and chocolate and paired with a chocolate cookie-crumb crust is a sensuous experience to make and a celestial experience to eat—the perfect decadent dessert to enjoy over the holidays and also a great addition to the holiday buffet table.

12 ounces semisweet chocolate chips

26 chocolate wafer cookies, crushed

2 tablespoons plus 1 cup granulated sugar

1 tablespoon finely ground espresso coffee (do not use liquid espresso or instant espresso powder)

1/4 cup unsalted butter, melted

3 packages (8 ounce) cream cheese, softened

3 tablespoons all-purpose flour

3 large eggs

2 large egg yolks

1/4 cup hot espresso or extra-strength coffee

1 cup whipping cream

36 dark-chocolate-covered espresso beans (optional)

Whipped cream (optional)

1. Preheat the oven to 350° F. Lightly grease a 9-inch springform pan.

2. Melt the chocolate chips in a microwave or the top of a double boiler (see Cook’s Hint below), being careful not to scorch the chocolate or let it contact the water. Pour into a bowl and reserve.

3. To make the crust, place the cookies, the 2 tablespoons sugar, ground coffee, and butter in a medium mixing bowl. Blend thoroughly and pour into the prepared springform pan. Pat the crumb mixture on the bottom of the pan and up the sides if enough remains. Refrigerate while you prepare the filling.

4. To make the filling, place the softened cream cheese in a large mixing bowl and beat with an electric mixer at low to medium speed until creamy. Add the 1 cup sugar to the cream cheese and beat on medium speed until fluffy. Sprinkle the flour over the cream-cheese mixture and blend thoroughly. Add the eggs and egg yolks, one at a time, being sure each is thoroughly incorporated. Beat in the reserved melted chocolate, hot espresso, and whipping cream at low speed.

5. Pour the batter over the crust and bake for 1 hour. Turn off the heat and leave the cake in the oven an additional 40 minutes without opening the door. Place the cheesecake on a wire rack and cool completely, then garnish the edges of the cheesecake with chocolate-covered espresso beans, if desired.

6. Refrigerate at least overnight, or preferably for 1 or 2 days to let the flavors meld. Slice and serve with whipped cream, if desired.

Cook’s Hint: To melt chocolate, first chop it into small pieces. Pour water into the bottom pot of a double boiler, bring the water barely to a simmer (do not boil!), then put the chocolate in the top of the double boiler and place it over the warm water. Slowly melt the chocolate while stirring constantly. Make sure that no steam or condensation from the spoon comes in contact with the chocolate at any point. If the natural starch in the chocolate combines with water, the mass will thicken or “seize,” making it lumpy and unusable. When the chocolate is about halfway melted, remove the top pot and continue stirring until the chocolate is completely melted. Alternatively, to melt chocolate in a microwave, put it into a microwave-safe dish and microwave on LOW for 30 seconds, then stir. Microwave on LOW another 30 seconds and stir again. If big lumps of chocolate still remain, microwave another 30 seconds. Continue this process until only small lumps remain, then stir to finish melting.


« Older PostsNewer Posts »