Golden Beet Carpaccio

February 1, 2010

Golden Beet Carpaccio

Varietal: Chardonnay

Serves 4

You either love ‘em or you hate ‘em. Of course, I’m talking about beets. But if you are an aficionado, you’ll especially appreciate this recipe that comes from my seventh book, Pacific Northwest Wining & Dining, thanks to chef Maria Hines, owner of Tilth restaurant. Totally organic Tilth is an unpretentious, buttery-yellow space located in a Craftsman-style house in the bustling Wallingford neighborhood of Seattle, a few miles north of downtown. Almost everything on the menu is preceded by the farmers’ or fishers’ names, so you can eat to your heart’s content with a clear conscience. The salad below demonstrates Chef Maria’s style of using simple ingredients to create bold flavors and beautiful plate presentations. The salad can take on a more rustic look if you simply cut the golden beets into one-inch cubes and toss them with the vinaigrette instead of slicing the beets and drizzling the vinaigrette.

Herb Vinaigrette

4 sprigs fresh flat-leaf parsley

4 sprigs fresh tarragon

4 sprigs fresh chervil

4 fresh chive stalks

1/4 cup extra virgin olive oil

1 tablespoon red wine vinegar

2 medium golden or red beets, scrubbed and tops and root ends trimmed (See Cook’s Hints, below)

5 sprigs fresh thyme, or 1/2 teaspoon dried thyme, crumbled

Kosher salt

Freshly ground black pepper

1/4 cup pine nuts, walnuts, or hazelnuts, toasted (See Cook’s Hints, below)

1/2 cup (2 ounces) fresh, soft goat’s-milk cheese (chèvre), crumbled

1. To make the Herb Vinaigrette, mince the parsley, tarragon, chervil, and chives. Transfer to a small mixing bowl and gently stir in the olive oil and vinegar. Set aside.

2. Preheat the oven to 400°F. Line a small roasting pan with aluminum foil.

3. Add the beets and thyme sprigs to the roasting pan and sprinkle with salt and pepper.
Fill the pan with water until the beets are almost completely submerged, cover with aluminum foil, and bake the beets for 1 to 1  1/4 hours, or until they are very tender. To test, insert the tip of a small, sharp knife into the center of one of the beets. Remove the beets from the pan and let cool. When the beets are cool enough to handle, remove the skins.

4. To serve, slice the beets into very thin rounds. Arrange them on 4 small plates in a spiral pattern, overlapping them to form a circle. Drizzle the beets with the vinaigrette, then sprinkle the pine nuts and goat cheese evenly over the beets. If desired, sprinkle lightly with salt and pepper.

Cook’s Hints: (1) To toast nuts or seeds (sesame, mustard, coriander, pumpkin, or cumin), heat them in a small, dry skillet over medium heat for 3 to 5 minutes, or until they begin to turn light brown and/or give off their aroma (mustard seeds begin to pop), shaking the pan back and forth often so the ingredients do not burn. Remove from heat, cool, and add to your recipe, or grind as directed. (2) Chef Maria uses a clean, dry kitchen towel to remove the beet skins by simply wiping them off, a method that also saves your hands from getting stained by beet juice.

Recipe reprinted from Pacific Northwest Wining & Dining: The People, Places, Food, and Drink of Washington, Oregon, Idaho, and British Columbia (Wiley, $34.95) by Braiden Rex-Johnson.

Coffee-Toffee Choco-Cinnamon Bars

January 1, 2010

Coffee-Toffee Choco-Cinnamon Bars

Coffee-Toffee Choco-Cinnamon Bars

Varietal: Tawny Port

These easy-to-make bar cookies are rife with chocolate, coffee, cinnamon and vanilla, the same Essential Cane sugars you’ll sprinkle over the top for added flavor and crunch.

Makes 20 bars

1/3 cup unsalted butter or margarine, softened

1 cup firmly packed brown sugar

1 large egg

1/2 cup double-strength hot coffee or regular-strength espresso (See Cook’s Hint, below)

1 2/3 cups sifted all-purpose flour

1/2 teaspoon baking powder

1/2 teaspoon baking soda

1/2 teaspoon table salt

1/2 teaspoon ground cinnamon

1/2 cup semi-sweet chocolate chips

1/4 cup chopped walnuts

Vanilla Glaze (recipe follows)

2 tablespoons each Essential Cane Dark Cocoa, Espresso, Vanilla Bean and Cinnamon Flavored Cane Sugars, or to taste

Vanilla Glaze

1 1/2 cups sifted confectioners’ sugar

1 tablespoon unsalted butter, softened

3 tablespoons whole milk or half-and-half

1 teaspoon pure vanilla extract

1. Preheat the oven to 375° F. Lightly grease a 9- by 13-inch baking pan or spray with nonstick cooking spray.

2. In a large mixing bowl, with a wooden spoon, whip the butter and brown sugar until well blended, then add the egg and coffee and stir until completely incorporated.

3. Sift together the flour, baking powder, baking soda, salt and cinnamon. Add the dry ingredients to the wet ingredients and blend well. Stir in the chocolate chips and walnuts.

4. Spread the batter in the prepared baking pan and bake until the bars rise and turn golden, and a toothpick inserted in the center comes out clean, 12 to 15 minutes. Place the baking pan over a wire rack and allow the bars to cool completely.

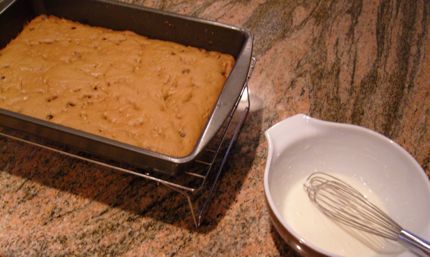
5. To make the glaze, in a small mixing bowl, whisk the confectioners’ sugar, butter, milk and vanilla until smooth. Pour the icing over the cooled bars and sprinkle evenly with the sugars. Allow the icing to set, then cut into squares.

Cook’s Hint: Use hot, freshly brewed coffee or espresso, or rewarm leftover coffee or espresso in the microwave or on the stovetop.

Copyright 2009 by Braiden Rex-Johnson.

Sun-Dried Tomato and Pesto Torte

December 1, 2009

Sun-Dried Tomato and Pesto Torte

Sun-Dried Tomato and Pesto Torte

Varietal: Syrah, Chardonnay (Unoaked), Lemberger, or Rosé

Serves 16 to 20 as an appetizer

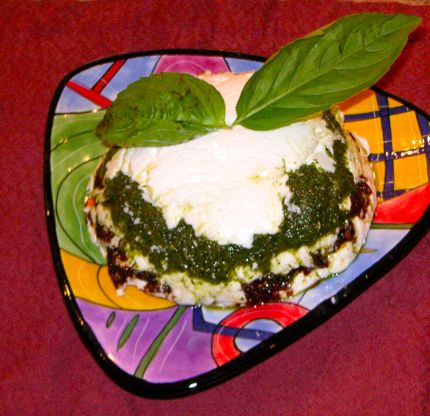
This flavorful, easy-to-make appetizer makes a beautiful plate presentation that will be perfect for entertaining friends and family around the holidays. For red-wine lovers, pair the luscious, boldly flavored torte with Syrah or Lemberger; white-wine lovers will prefer an unoaked Chardonnay, while a dry Rosé is another intriguing option.

Three 8-ounce packages cream cheese, at room temperature

1/2 cup (2 ounces) freshly grated Parmesan cheese

1 tablespoon minced garlic

7 ounces homemade basil-based pesto, one 7-ounce container refrigerated basil-based pesto, or one 6.35-ounce jar basil-based pesto

One 8.5-ounce jar oil-packed sun-dried tomatoes, well drained and minced

2 fresh basil leaves, for garnish

12 cherry tomatoes, for garnish

1 baguette, cut into 1/4-inch slices, for serving

1. One or two days before you plan to serve, line a 5-cup mold or medium mixing bowl with pieces of plastic wrap long enough to hang out over the sides (the long pieces will be used to wrap the torte). Place the cream cheese, Parmesan, and garlic in a food processor and pulse until well blended.

2. Spoon one-third of the cream cheese mixture into the bottom of the mold and smooth the top. Spoon the pesto evenly over the cream cheese layer. Spoon half of the remaining cream cheese mixture over the pesto and smooth the top. Evenly cover the second layer of cream cheese mixture with the sun-dried tomatoes. Spoon the remaining cream cheese mixture on top of the tomatoes and smooth the top.

3. Carefully strike the filled mold on the countertop to pack down the layers. Bring the long ends of plastic wrap up and over the top of the torte to cover completely. Refrigerate for at least 24 hours to allow the flavors to meld.

4. Just before serving, unwrap the long pieces of plastic wrap, place a serving platter over the mold, hold the platter, and carefully flip the mold and platter. Remove and discard the plastic wrap. Garnish the torte with fresh basil leaves and cherry tomatoes and serve with the baguette slices.

Cook’s Hint: You can make this torte up to 2 days ahead of time to allow the flavors to develop even further. You can also vary the flavor of the torte depending on the type of pesto choose. Use your own homemade version or various other varieties, such as arugula or cilantro.

Recipe reprinted from Pacific Northwest Wining & Dining: The People, Places, Food, and Drink of Washington, Oregon, Idaho, and British Columbia (Wiley, 2007, $34.95) by Braiden Rex-Johnson.

Tagliatelle with Balsamic Cream

November 1, 2009

Tagliatelle with Balsamic Cream

Tagliatelle with Balsamic Cream

Varietal: Chardonnay (Unoaked), Pinot Gris, or Gëwurztraminer

Serves 4 as a main dish; 6 to 8 as an appetizer

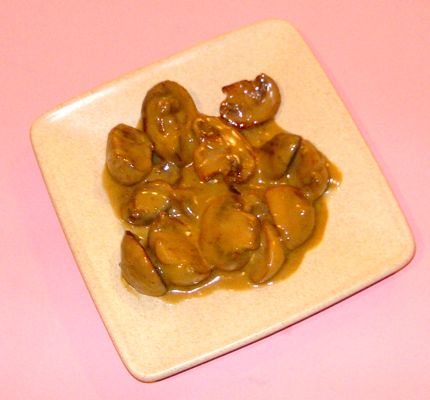
This heady mushroom and balsamic cream sauce is best served over fresh tagliatelle (homemade or store bought). Minus the pasta, it also serves as an alluring side dish or sauce with meat entrées such as grilled chicken, pork, or beef. The dish is very versatile as far as wine pairing goes; consider a full-bodied Pinot Gris, such as the ones produced by King Estate Winery in Oregon. Chilled Gewürztraminer or an unoaked Chardonnay would also work nicely with this toothsome dish.

1 pound homemade or store-bought fresh or dried tagliatelle (if you opt for the dried, increase the amount of mushrooms to 1 1/2 pounds)

Extra virgin olive oil

4 tablespoons (1/2 stick) unsalted butter

1 pound small, whole cultivated mushrooms (such as white or cremini) or small, whole wild mushrooms (such as chanterelle or morel; see Cook’s Hint, below)

1/2 cup dry white wine

Pinch of sea salt

Pinch of freshly ground black pepper

1 tablespoon all-purpose flour

1/2 cup heavy whipping cream

2 tablespoons high-quality balsamic vinegar

3 tablespoons freshly grated Parmigiano-Reggiano cheese

1. Cook the homemade pasta until al dente, 2 to 3 minutes, or cook the store-bought pasta according to the package instructions until al dente. Drain well. Sprinkle lightly with extra virgin olive oil, toss to coat well, and keep warm until serving.

2. Melt 2 tablespoons of the butter in a heavy skillet over medium-high heat. When it begins to foam, add the mushrooms and cook, stirring occasionally, until the mushrooms begin to release their juices and aroma, 5 to 7 minutes. Lower the heat if the mushrooms begin to brown.

3. Add the wine, salt, and pepper and simmer over medium heat, stirring occasionally, until most of the liquid has evaporated, 3 to 4 minutes.

4. Sprinkle the flour over the mushrooms and stir quickly and evenly to prevent lumps. Cook, stirring constantly, until the flour is fully incorporated and loses its raw aroma, 1 to 2 minutes.

5. Slowly add the cream, stirring well after each addition to avoid lumps, and cook, stirring constantly, for 2 to 3 minutes.

6. Turn off the heat. Cut the remaining 2 tablespoons of butter into small pieces and add it a few pieces at a time, stirring well after each addition. Remove the pan from the heat and stir in the balsamic vinegar.

7. Pour the mushroom-cream sauce over the pasta and toss to coat. Divide the pasta among soup dishes or pasta bowls. Sprinkle with the cheese, and serve immediately.

Cook’s Hint: There is much debate over the best way to clean mushrooms. For cultivated mushrooms that are smooth and relatively clean (such as white or cremini), I find that a quick rinse in cold water, then thorough drying with a clean kitchen towel or paper towel, works best. For wild mushrooms (such as chanterelles) that may contain deep furrows, pine needles, and other debris, a mushroom brush and a gentle wipe with a damp cloth does the trick. Badly bruised or spongy spots, and signs of insects, should always be removed before cooking. Morels are another story, because their honeycomb surface can contain a lot of grit. To clean morels, if they are large enough, tap them gently (stem side down on a hard surface) to remove as much grit as possible. Then fill a large mixing bowl with cool water and add 1 tablespoon of table salt, stirring well to dissolve the salt. Add the morels and swish them through the water to remove as much grit (and insects, which are repelled by the salt) as possible. Drain the water and replace with clean cool water. Repeat the cleaning process two to three times, or until the water runs clear. After draining the last time, squeeze out as much water as possible from the morels, then pat them dry with a clean kitchen towel or on paper towels. Cut out any discolorations or spoiled spots and discard any mushrooms that are spongy (which means they are old). Slice large mushrooms in half; leave small and medium mushrooms whole.

Recipe reprinted from Pacific Northwest Wining & Dining: The People, Places, Food, and Drink of Washington, Oregon, Idaho, and British Columbia (Wiley, 2007, $34.95) by Braiden Rex-Johnson.

Duck Breasts with Lemon-Roasted Olives

October 1, 2009

Duck Breasts with Lemon-Roasted Olives

Duck Breasts with Lemon-Roasted Olives

Varietal: Merlot, Chardonnay, Riesling, Semillon

Serves 4

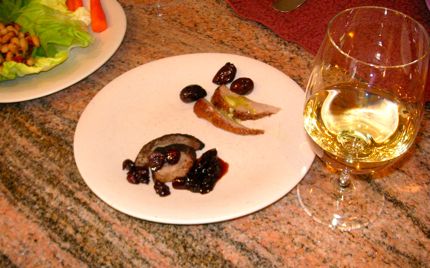
Slow roasting food on wooden planks made of cedar, alder, or maple gives fish, meat, poultry, and vegetables a distinctive smoky succulence and appealing fresh flavor. Much like the oak barrels in which wine is aged, planks can impart different flavors to food. Western alder is pale yellow to reddish-brown in color with a fine, close grain. Because of its rich, pure smoke flavor (with a light vanilla compliment), western alder is many people’s preferred wood for smoking, as well as the wood traditionally used for smoking food in the Northwest. A wide range of wines works with the duck recipe that follows, thanks to its smoky and salty flavors and rich textures. Try Semillon, Riesling, or Chardonnay among white varietals; Merlot among red wines.

Four 4-ounce boneless, skinless duck breasts

Kosher salt

Freshly ground black pepper

1/3 cup freshly squeezed lemon juice

1 tablespoon minced garlic

1 teaspoon freshly grated lemon zest

1/4 teaspoon lemon pepper

1/3 cup olive oil

20 kalamata or green olives with pits, or a combination

1. At least 15 minutes before cooking, arrange the oven rack in the upper or middle position. Place the plank on the rack, then preheat the oven to 350°F.

2. Sprinkle the duck breasts with salt and pepper. Leaving the heated plank on the oven rack, pull out both the plank and rack and arrange the seasoned breasts on the heated plank without crowding. (This eliminates having to move a hot plank around the kitchen.) Roast for 20 minutes.

3. While the duck is cooking, prepare the dressing by mixing together the lemon juice, garlic, lemon zest, and lemon pepper in a small bowl. Whisk in the olive oil a few drops at a time, incorporating well after each addition, until the sauce is thick and smooth (emulsified).

4. Turn the duck breasts over and surround with the olives; drizzle half the dressing over the duck. Roast for 20 minutes, or until the duck is no longer pink when cut into and the juices run clear (for medium).

5. To serve, divide the duck breasts and olives among 4 dinner plates and drizzle with the remaining dressing.

Cook’s Hint: Before using a wood plank for the first time, it is necessary to “season” it-after multiple seasonings, the plank will turn a rich brown color and will no longer need to be seasoned before each use. To season the plank, pour 1 to 2 tablespoons of olive oil (preferred) or vegetable oil into a small bowl. Using a paper towel or soft, clean cloth dipped in the oil, lightly coat the top surface of the plank with the oil. Do not oil the underside of the plank. Always preheat the plank for 15 minutes, following recipe directions, before placing food on the plank to roast. Also, when your plank is new, and as it develops cracks and warps over time, tighten the steel tightening rods that are inserted along the ends of the plank by using the adjustment tool (supplied with most planks) or a 7/16-inch socket wrench. When planking, do not raise the oven heat about 400°F. Clean the plank with a soft brush, warm water, and mild soap or detergent, never in the dishwasher. And never use a plank designed for use in the oven on a barbecue or grill!

Recipe reprinted from Pacific Northwest Wining & Dining: The People, Places, Food, and Drink of Washington, Oregon, Idaho, and British Columbia (Wiley, 2007, $34.95) by Braiden Rex-Johnson.

Coriander-Crusted Albacore Tuna with Spicy Buckwheat Noodle Salad

September 1, 2009

Coriander-Crusted Albacore Tuna

Coriander-Crusted Albacore Tuna with Spicy Buckwheat Noodle Salad

Varietal: Gewürztraminer

Serves 6 as an appetizer; 4 as a main course

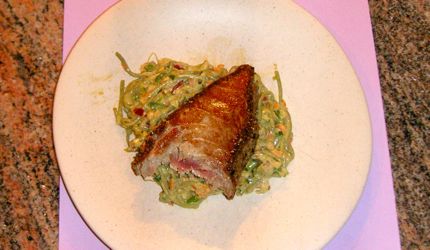
Although we usually think of albacore as one variety of tuna in a can (as in the photo above), it’s also one of the Northwest’s great summertime fresh finfish catches–inexpensive, in good supply, and sustainable. With bold flavors from the albacore, buckwheat noodles, and grated fresh veggies, this recipe makes a lovely appetizer or luncheon dish. It comes from Sooke Harbour House on Vancouver Island in British Columbia, and demonstrates the merging of Asian ingredients with Western cuisine that is such a calling card of Pacific Northwest Cuisine. The perfect wine pairing

Spicy Buckwheat Noodle Salad

1/3 cup grated carrot

1/3 cup grated celery 1/3 cup grated turnip or daikon radish

1/4 cup minced red onion 1/4 cup homemade or store-bought mayonnaise (Best Foods or Hellmann’s brand recommended)

1/4 cup sour cream

1 tablespoon minced fresh ginger

2 teaspoons minced garlic

2 tablespoons minced green onions (white and light white parts only)

2 tablespoons soy sauce

2 tablespoons minced jalapeño pepper, seeds and membranes removed

4 ounces cooked Japanese soba noodles (see Cook’s Hint, below)

Coriander-Crusted Albacore Tuna

2 tablespoons ground coriander

1 tablespoon kosher salt

1 tablespoon coarsely ground black pepper

12 to 14 ounces albacore tuna loin, chilled

1/4 cup safflower oil

Edible flowers, such as calendulas, nasturtiums, or begonia petals, for garnish (optional)

1. At least an hour before you plan to serve, prepare the Spicy Buckwheat Noodle Salad. Place the carrot, celery, turnip, onion, mayonnaise, sour cream, ginger, garlic, green onions, soy sauce, and jalapeño in a medium bowl and mix well.

2. Add the noodles and gently mix until well coated with the sauce and the vegetables are distributed throughout. Cover and refrigerate for at least 1 hour or up to 1 day.

3. To prepare the tuna, place the coriander, salt, and pepper in a small bowl and mix well. Slice the chilled tuna in half lengthwise to form two cylinders of tuna.

4. Rub the spice mixture onto the round portion (not the ends) of the tuna pieces, being sure to spread it evenly on all sides.

5. Heat the oil in a large skillet over medium-high heat. When the oil just begins to smoke, carefully add the tuna pieces and sear for 2 minutes on each side. The tuna should be opaque on the outside, but still raw on the inside; lower the heat if the tuna starts to brown too quickly.

6. Transfer the tuna to a plate, cover, and refrigerate for a minimum of 30 minutes and up to 1 day.

7. When ready to serve, decoratively mound some of the noodle salad on each of 4 or 6 serving plates. Cut the chilled tuna into 1/2-inch-thick slices and arrange on top of the noodles. If desired, garnish with edible flowers.

Cook’s Hint: Japanese soba noodles are made from buckwheat and wheat flour, and are dark, brownish-gray in color. They are available in Asian markets and some grocery stores. To cook them, bring a large pot of salted water to a boil. Add the noodles and cook for 5 to 7 minutes, or until al dente, stirring occasionally. Rinse them in cool water and drain well before using. If not using immediately, spray with nonstick olive-oil spray and toss gently, or toss with a teaspoon or two of canola oil to keep the noodles from sticking together. If soba noodles are unavailable, the seared tuna also works well when served on a bed of steamed rice, couscous, or salad greens. Or try cutting leftover tuna into small cubes and using as a soup garnish or mixing it with pickled beets, walnuts, and feta cheese for a main-dish salad.

Recipe reprinted from Pacific Northwest Wining & Dining: The People, Places, Food, and Drink of Washington, Oregon, Idaho, and British Columbia (Wiley, $34.95) by Braiden Rex-Johnson.
Buckwheat-Honey Pancakes with Mascarpone Cream and Ice-Wine Peaches

August 1, 2009

Buckwheat and Mascarpone Pancakes

Buckwheat-Honey Pancakes with Mascarpone Cream and Ice-Wine Peaches

Varietal: Dessert Wines or Sparkling Wines

Serves 4

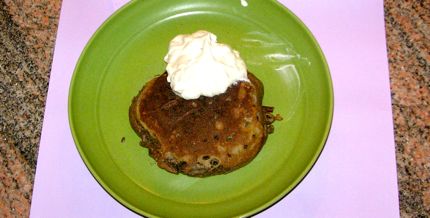
These healthy pancakes become decadent thanks to the additions of cardamom-scented mascarpone (Italian cream cheese) “lightened” with whipped cream, and peaches flavored with Okanagan-produced Ice Wine. You can make them now, during the height of fresh peach season, or use frozen fruit during the winter months. Pair the pancakes with the leftover Ice Wine or a slightly sweet Champagne or sparkling wine for a truly unforgettable Sunday brunch treat.

Ice Wine Peaches

3 to 4 ripe peaches, peeled and sliced into bite-sized pieces, or 3 to 4 cups frozen peach slices, defrosted
1 cup good-quality Ice Wine

Mascarpone Cream

1 cup mascarpone cheese
2 tablespoons granulated sugar
1 teaspoon pure vanilla extract
1/2 teaspoon ground cardamom
1/2 cup whipping cream, whipped to stiff peaks

Buckwheat-Honey Pancakes

3/4 cup all-purpose flour
3/4 cup buckwheat flour
1 tablespoon baking powder
1 teaspoon baking soda
1/2 teaspoon table salt
2 large eggs
1 to 1 1/2 cups plain soy milk or whole milk
2 tablespoons melted butter or canola oil
1 tablespoon honey
1 to 2 tablespoons vegetable oil

1. At least 2 hours before you plan to serve, make the Ice-Wine Peaches. Place the peaches in a medium nonreactive bowl with a lid, pour the wine over the fruit, and stir gently. Cover and let stand for 2 hours at room temperature or overnight in the refrigerator.

2. To make the Mascarpone Cream, in a medium bowl using a whisk, whip the mascarpone until smooth and lightened. Add the sugar, vanilla, and cardamom, and whisk until well blended. With a spatula, fold in the whipped cream. Use immediately or cover and refrigerate.

3. Preheat the oven to 200 degrees. Line a rimmed baking sheet with parchment paper.

4. In a large bowl, sift together the flours, baking powder, baking soda, and salt. In a separate bowl, whisk the eggs, 1 cup of the soy milk, the melted butter, and honey. Make a well in the center of the dry ingredients and add the liquid ingredients, whisking until almost smooth (only a few lumps should remain). If needed, add additional soy milk until the mixture reaches the proper consistency.

5. Heat 1 tablespoon of the oil in a large skillet or griddle (nonstick works well for this) over medium-high heat. When the oil is hot but not smoking, spoon the pancake batter into the skillet in the desired amount. Cook until bubbles appear on the surface of the pancakes, 2 to 3 minutes.

6. Turn and cook until the pancakes turn light brown on the underside, 1 to 2 minutes more. Repeat with the remaining batter, adding more oil as necessary. Transfer the cooked pancakes to the prepared baking sheet and keep them warm in the oven until serving.

7. Divide the pancakes among 4 plates, divide the Mascarpone Cream over the pancakes, and top with the peaches.

Cook’s Hint: The peaches are good on other things besides pancakes. For a simple and elegant summer dessert, serve them over good-quality vanilla ice cream or frozen yogurt and pound or angel-food cake. Make an extra batch of peaches during the summer, freeze, and defrost for a taste of summer during the long, cold winter!

Recipe reprinted from Pacific Northwest Wining & Dining: The People, Places, Food, and Drink of Washington, Oregon, Idaho, and British Columbia (Wiley, $34.95) by Braiden Rex-Johnson.
Northwest Seafood with Simple Soy Glaze

July 1, 2009

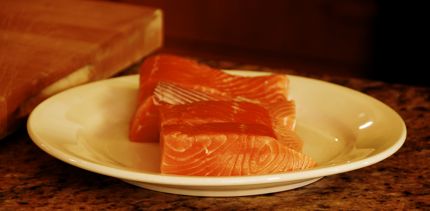
Northwest Wild Salmon

Northwest Seafood with Simple Soy Glaze

Varietal: Off-Dry Riesling

Makes 1/4 cup

I have read that most people cook the same eight basic recipes over and over again. If that’s the case at your house, I hope this recipe will become one of your eight favorites because it’s so delicious, easy to make, and versatile that you can use it on almost any fish or shellfish you choose. Suggested seafood partners with the glaze include salmon, halibut, swordfish, black cod (sablefish), sea scallops, or sustainable shrimp (peeled and deveined). Don’t forget to open a bottle of off-dry Riesling from a top-quality producer, such as Long Shadows, Pacific Rim, or Poet’s Leap, all from Washington State.

1 tablespoon light cooking oil, such as canola or vegetable oil

1 tablespoon soy sauce or low-sodium soy sauce

1 tablespoon honey, brown sugar, or maple syrup

1 tablespoon Dijon mustard

11/2 teaspoons prepared horseradish

1. In a small bowl, mix together the oil, soy sauce, honey, and mustard. Add the horseradish and blend thoroughly.

2. Lightly oil a broiling pan with a rack or spray the rack with nonstick cooking spray. Place fish fillets or steaks or shellfish on the rack and lightly brush the seafood with the glaze. Broil 3 to 4 inches from the heat source for 3 minutes, then brush the fillets again. If the seafood starts to brown too much, move the pan 4 to 6 inches from the heat source. After 3 minutes, brush once more, then continue broiling until the salmon reaches desired doneness.

Cook’s Hints: Now comes the really fun, creative part of this recipe. If you don’t like horseradish, you can substitute freshly grated ginger, Chinese five-spice powder, Japanese seven-spice seasoning (shichimi togarashi), or hot chili oil for an Asian flair, or Cajun blackening mix for a Southwest touch. Add the alternative seasonings a little at a time, until you reach the level of spiciness or hotness you prefer.

Simple Soy Glaze works well with vegetables, especially asparagus. To prepare fresh asparagus, snap the tough, “woody” white ends off each spear by holding the top half of an asparagus spear in one hand, the bottom half with the thumb and forefinger of your other hand. Bend the spear until it snaps. This will occur naturally where the tough and tender parts meet. Use the bottoms of the stalks to make asparagus stock for soup. Cook the remaining portion as desired. Or, for a more elegant preparation, using a clean, sharp vegetable peeler, peel down from about 2 inches from the ends of the asparagus. Peel all around, then cut off the very end with a small, sharp paring knife.

Fresh asparagus also makes a lovely summer salad when simply grilled with extra virgin olive oil, kosher salt, and black pepper. Cook 8 to 12 minutes, or until just tender. Then transfer to salad plates, drizzle with good-quality balsamic vinegar, and sprinkle with toasted hazelnuts (or walnuts) and plumped dried cherries or cranberries.

To toast small quantities of nuts, heat them in a small, dry skillet over medium heat for 3 to 5 minutes, or until they begin to turn light brown and/or give off their aroma (mustard seeds begin to pop), shaking the pan back and forth often so the ingredients do not burn. Remove from heat, cool, and add to your recipe, or grind as directed.

To plump dried fruits, add the fruits to a small saucepan and cover with water, stock, or liqueur (such as Madeira, Port, or cream-style Sherry). Bring to a boil, cover, and remove the pan from the heat. Allow to stand 10 to 20 minutes, or until the fruit is plumped.

To speed the plumping process, put 1/2 cup water into a microwave-safe glass dish. Add the fruit and microwave on HIGH for 30 seconds. Stir and repeat. When the fruit begins to plump, remove from the microwave and cover. Let rest for 5 minutes, drain water, and use the fruit as directed.

Recipe reprinted from the “Pike Place Public Market Seafood Cookbook” (Ten Speed Press, 2007, $14.95) by Braiden Rex-Johnson.
Fresh Asparagus and Walla Walla Sweet Onion Quiche

June 1, 2009

Fresh Asparagus and Walla Walla Sweet Onion Frittata

Fresh Asparagus and Walla Walla Sweet Onion Quiche

Varietal: Viognier

Serves 6 to 8

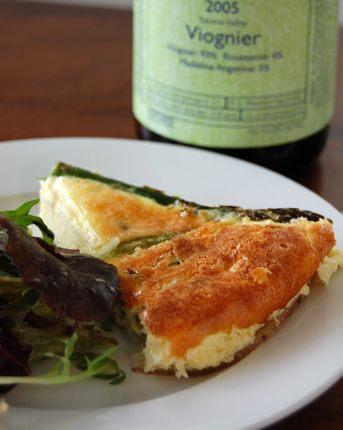
While staying at The Inn at Blackberry Creek in Walla Walla, Washington, we enjoyed the expert hospitality and relaxed ambience at the restored Victorian farmhouse (circa 1906). Three idyllic days at the Inn left me hungry for more of innkeeper Barbara Knudson’s sumptuous breakfast dishes, which she prepares to order for her guests every morning. Barbara’s quiche, which she pairs with fresh melon and French pastries, focuses on a few of the best-known and beloved spring vegetables common in the Walla Walla Valley-fresh asparagus and sweet onions. It reheats well, and also makes a great light lunch when served with sliced melon and tomatoes, along with a glass of Cougar Crest Winery Viognier, one of the Valley’s 70-odd wineries.

1 large red potato
2 tablespoons unsalted butter, melted
1/4 teaspoon kosher salt, plus extra for seasoning
1/4 teaspoon freshly ground black pepper, plus extra for seasoning
1 cup (about 4 ounces) grated Jarlsberg cheese
1 teaspoon canola or vegetable oil
8 to 10 asparagus stalks, woody stems broken off and discarded, remaining portion cut into 1-inch pieces, enough to measure 1 cup
1/3 cup coarsely chopped Walla Walla sweet onion or other variety of sweet onion, such as Maui or Vidalia
5 large eggs
1 1/2 cups half-and-half
1/2 cup plus 1 tablespoon finely grated Parmesan cheese
3 dashes of Tabasco sauce

1. Preheat the oven to 375°F. Lightly oil a 9-inch deep-dish pie pan or a 9-inch springform pan. If using the latter, wrap the outside with aluminum foil to catch any drips.

2. Peel the potato and cut it into paper-thin slices by hand or with a mandoline. Arrange the slices in a swirling pattern on the bottom of the pie pan, overlapping the slices.

3. Brush the potatoes with the melted butter, sprinkle lightly with salt and pepper, transfer to the oven, and cook for 12 to 15 minutes, or until lightly browned and just tender. Remove from the oven and sprinkle evenly with the Jarlsberg cheese.

4. Meanwhile, heat the oil in a small nonstick skillet, add the asparagus and onion, and cook, stirring often, until the onion is tender and lightly browned and the asparagus turns bright green, 5 to 7 minutes. Lightly season with salt and pepper and stir well. Arrange the asparagus-onion mixture evenly on top of the cheese and potatoes.

5. In a medium mixing bowl, whisk together the eggs, half-and-half, 1/2 cup of Parmesan cheese, the 1/4 teaspoon of the salt, the 1/4 teaspoon of the pepper, and the Tabasco. Pour over the asparagus mixture and sprinkle with the remaining 1 tablespoon Parmesan cheese. Place on a baking sheet to catch any drips, and bake 35 to 40 minutes, or until a knife inserted in the center comes out clean and the sides of the quiche are golden brown and puff slightly.

6. Transfer to a wire rack and allow to cool 5 to 10 minutes, then slice and serve.


Roasted Salmon with Sorrel Beurre Blanc

May 1, 2009

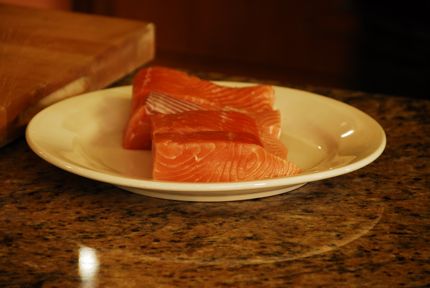
Alaskan wild salmon works beautifully with spring sorrel.

Roasted Salmon with Sorrel Beurre Blanc 

Varietal: Chardonnay (Unoaked) 

Serves 4 

Sorrel, a lemony perennial herb that appears in the garden in early spring, plays a starring role along with another Northwest favorite-wild salmon-in this recipe from Chef Rocky Maselli of Marché restaurant (www.marcherestaurant.com), located in the bucolic university town of Eugene, Oregon. Sorrel is known for its sour, acidic taste; when used in chef Rocky’s sauce, it turns a lovely celadon color with a slightly sour lemon taste and a nice hint of white wine and shallot. A good-quality unoaked Chardonnay, with lots of citrus and pineapple and a fresh, lively mouthfeel, pairs perfectly. 

2 tablespoons minced shallots 
1/2 cup dry white wine
1 cup heavy whipping cream
4 large fresh sorrel leaves
3 tablespoons cold unsalted butter, cut into 1/2-inch cubes
Kosher salt 
Freshly ground white pepper
Four 6-ounce center-cut salmon fillets, rinsed, drained, and patted dry
Olive oil
Freshly ground black pepper

1. Preheat the oven to 425°F. 

2. To make the beurre blanc, combine the shallot and wine in a small nonreactive saucepan. Cook over medium-high heat until the liquid is reduced to about 1 teaspoon, 8 to 10 minutes. Add the cream and cook, stirring occasionally, until it is reduced to the consistency of maple syrup and coats the back of a spoon, 8 to 10 minutes. While the cream is reducing, remove the ribs from the sorrel leaves and cut them into a chiffonade by stacking the leaves, rolling them like a cigar, and cutting crosswise into thin ribbons.

3. Stir the sorrel into the reduced cream, remove from the heat, and whisk in the butter piece by piece, incorporating the butter completely after each addition. Place a fine-meshed sieve over a mixing bowl, add the sauce, and strain, pressing out the solids with the back of a spoon to remove as much liquid as possible. (Alternatively, chef Rocky suggests you can use a hand-held electric mixer, a blender, or a food processor for this step; the result will be a smoother sauce that will not have to be strained.) Season to taste with salt and the white pepper. Keep the sauce warm (a double boiler or a water bath works well for this) while you prepare the salmon.

4. Ten minutes before cooking, preheat the oven to 375°F. Line a baking sheet with parchment paper. 

5. With a clean pastry brush, brush the salmon fillets lightly with olive oil, then sprinkle generously with salt and the black pepper. Place on the lined baking sheet and cook 12 to 15 minutes, or until they reach the desired doneness. 

6. To serve, transfer the salmon fillets to 4 dinner plates and spoon the sorrel sauce over the top.

Cook’s Hint: Sorrel is available in limited supply year-round in the specialty herb section of produce departments or at your neighborhood farmers’ market, although its peak season is in the spring. Look for bright-green, crisp leaves; store for up to three days in a plastic bag in the refrigerator. Chef Rocky suggests serving the dish with chive mashed potatoes or roasted new potatoes and spring vegetables such as asparagus, baby carrots, fava beans, or peas.

« Older PostsNewer Posts »